MacOS
The following instructions are based on Monterey v12.3.1.
Get Ready
- Ensure you have the latest version of Xcode.
- Download the Epic Games Launcher to access the Unreal Engine. Download
- Install Unreal Engine v5. Download
STEP ONE - Add Unreal Engine v4
Watch how to install Unreal Engine v4:
You can also read through this list:
-
Open Epic Games Launcher and view all versions of the Unreal Engine you have.
-
Click Library and the + button to add the v4 version

-
You can now click to install v4. (This takes some time)
-
Launch v4 (Be patient, this can take a little while)
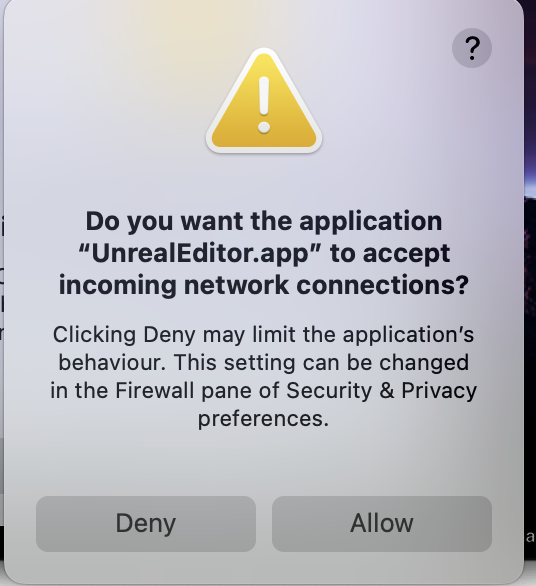
📃If a pop up appears: "Do you want the app UnrealEditor.app to accept incoming network connections" Select Allow
STEP TWO - Create a new project
-
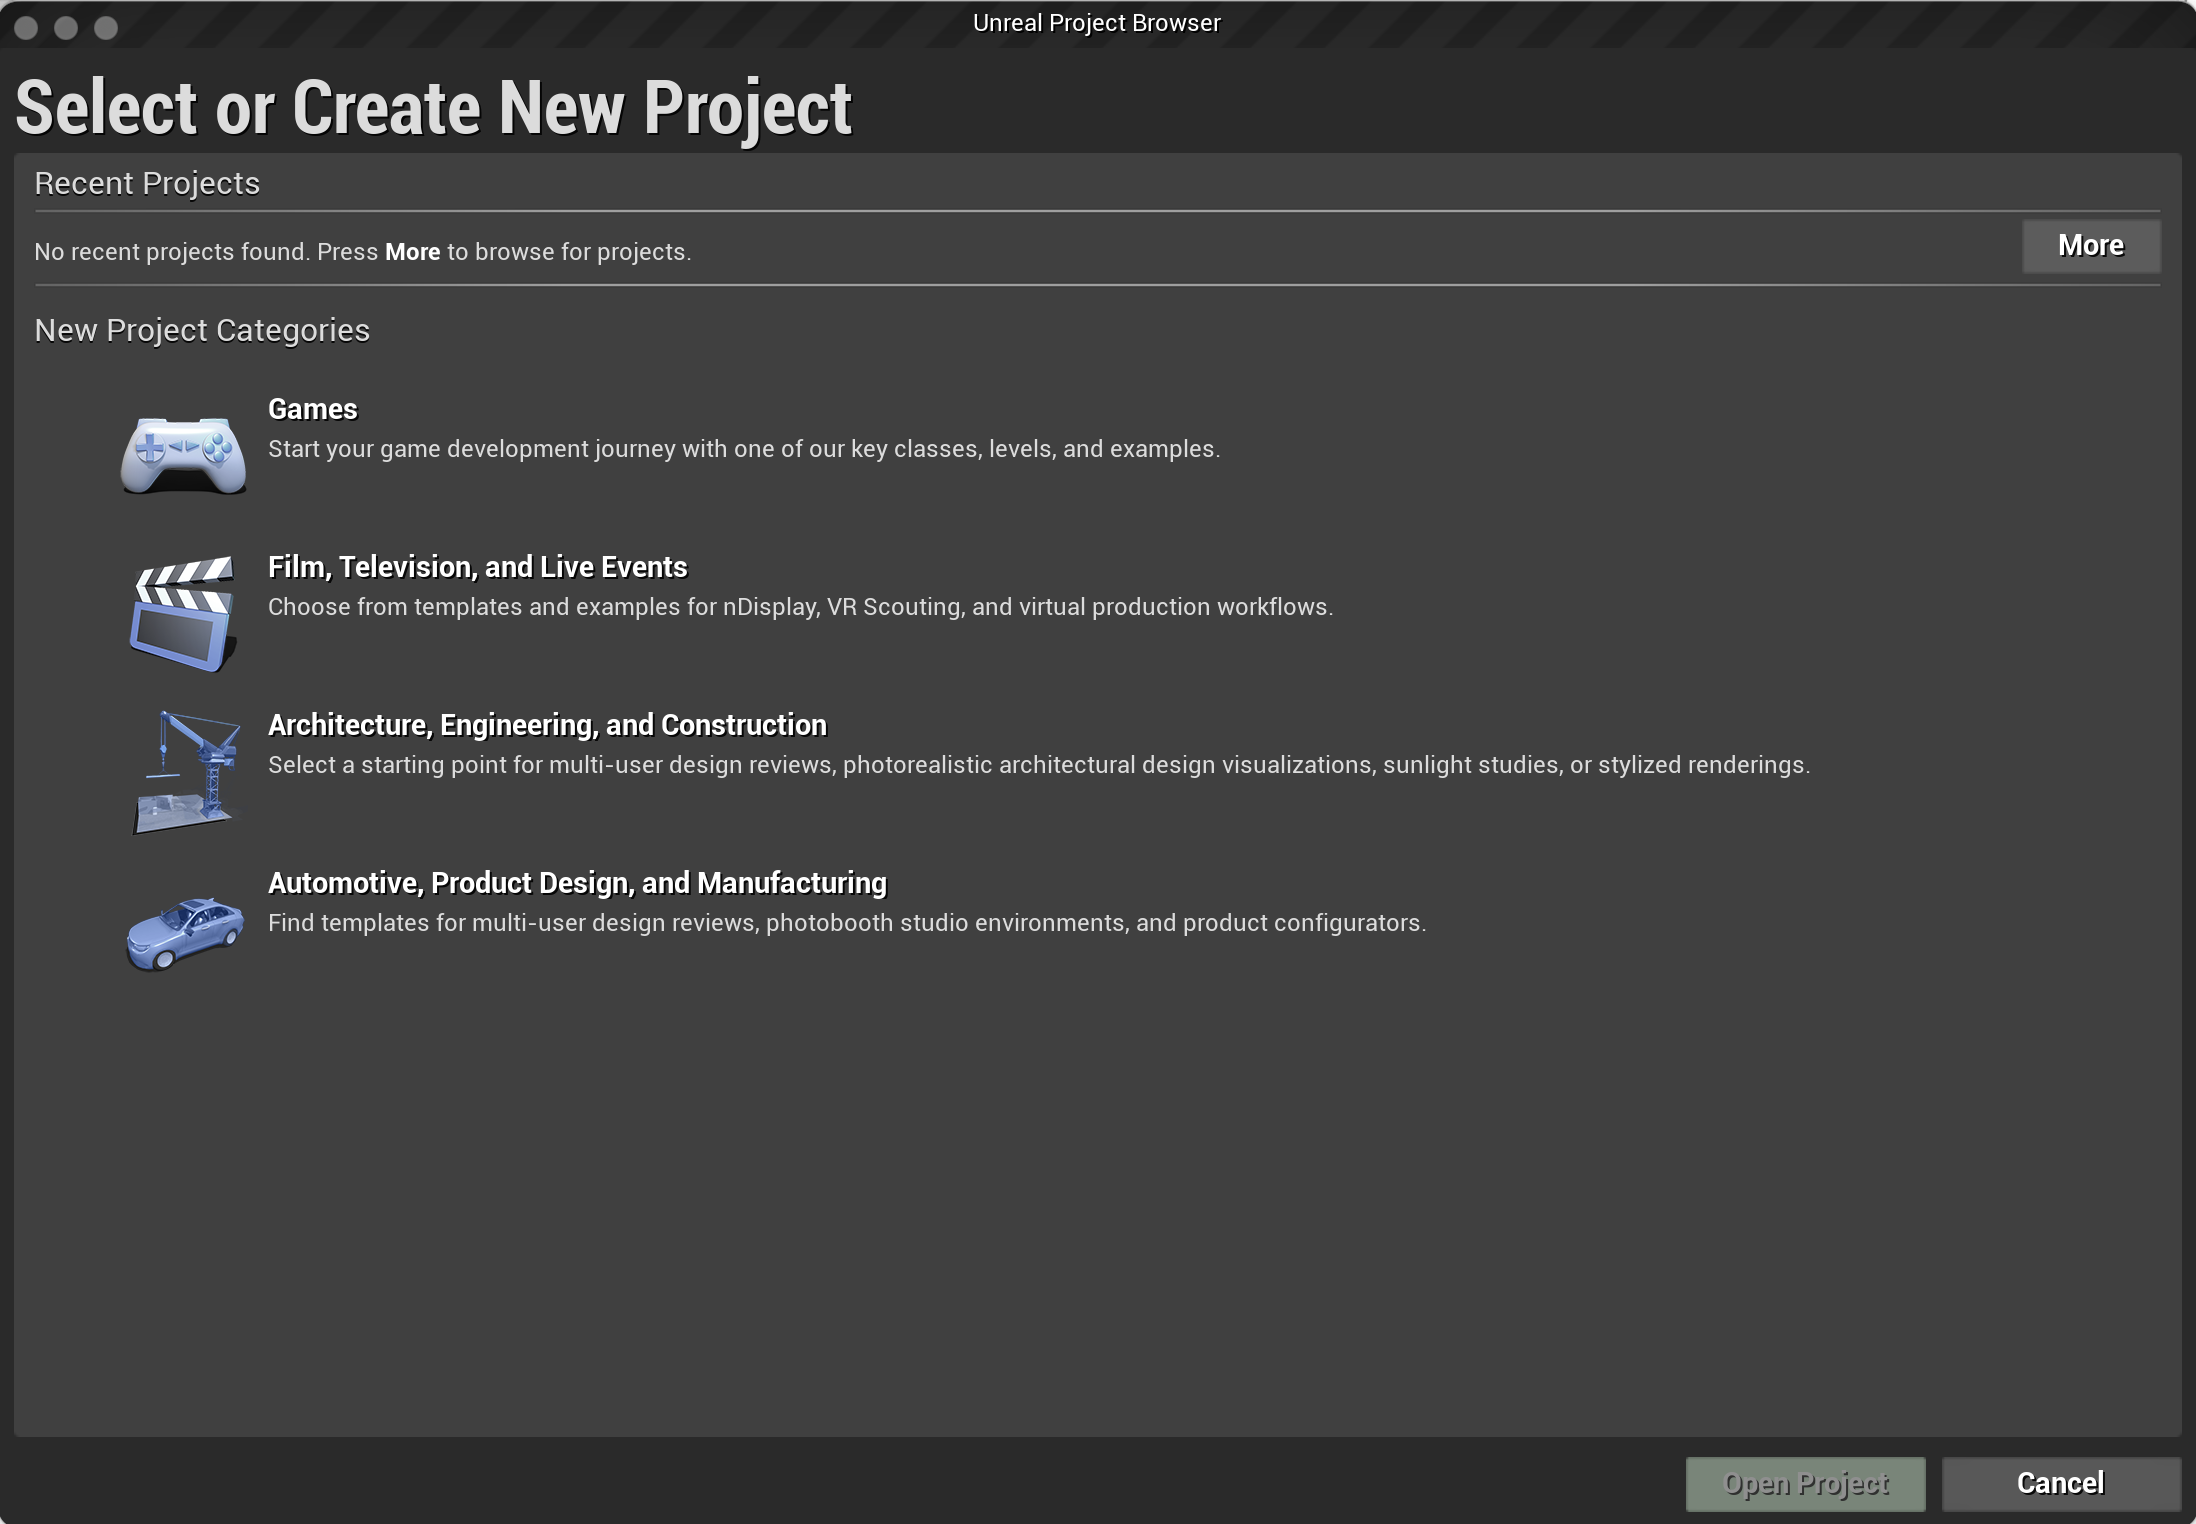
Inside the Unreal Project Browser, select Games and click Next
-
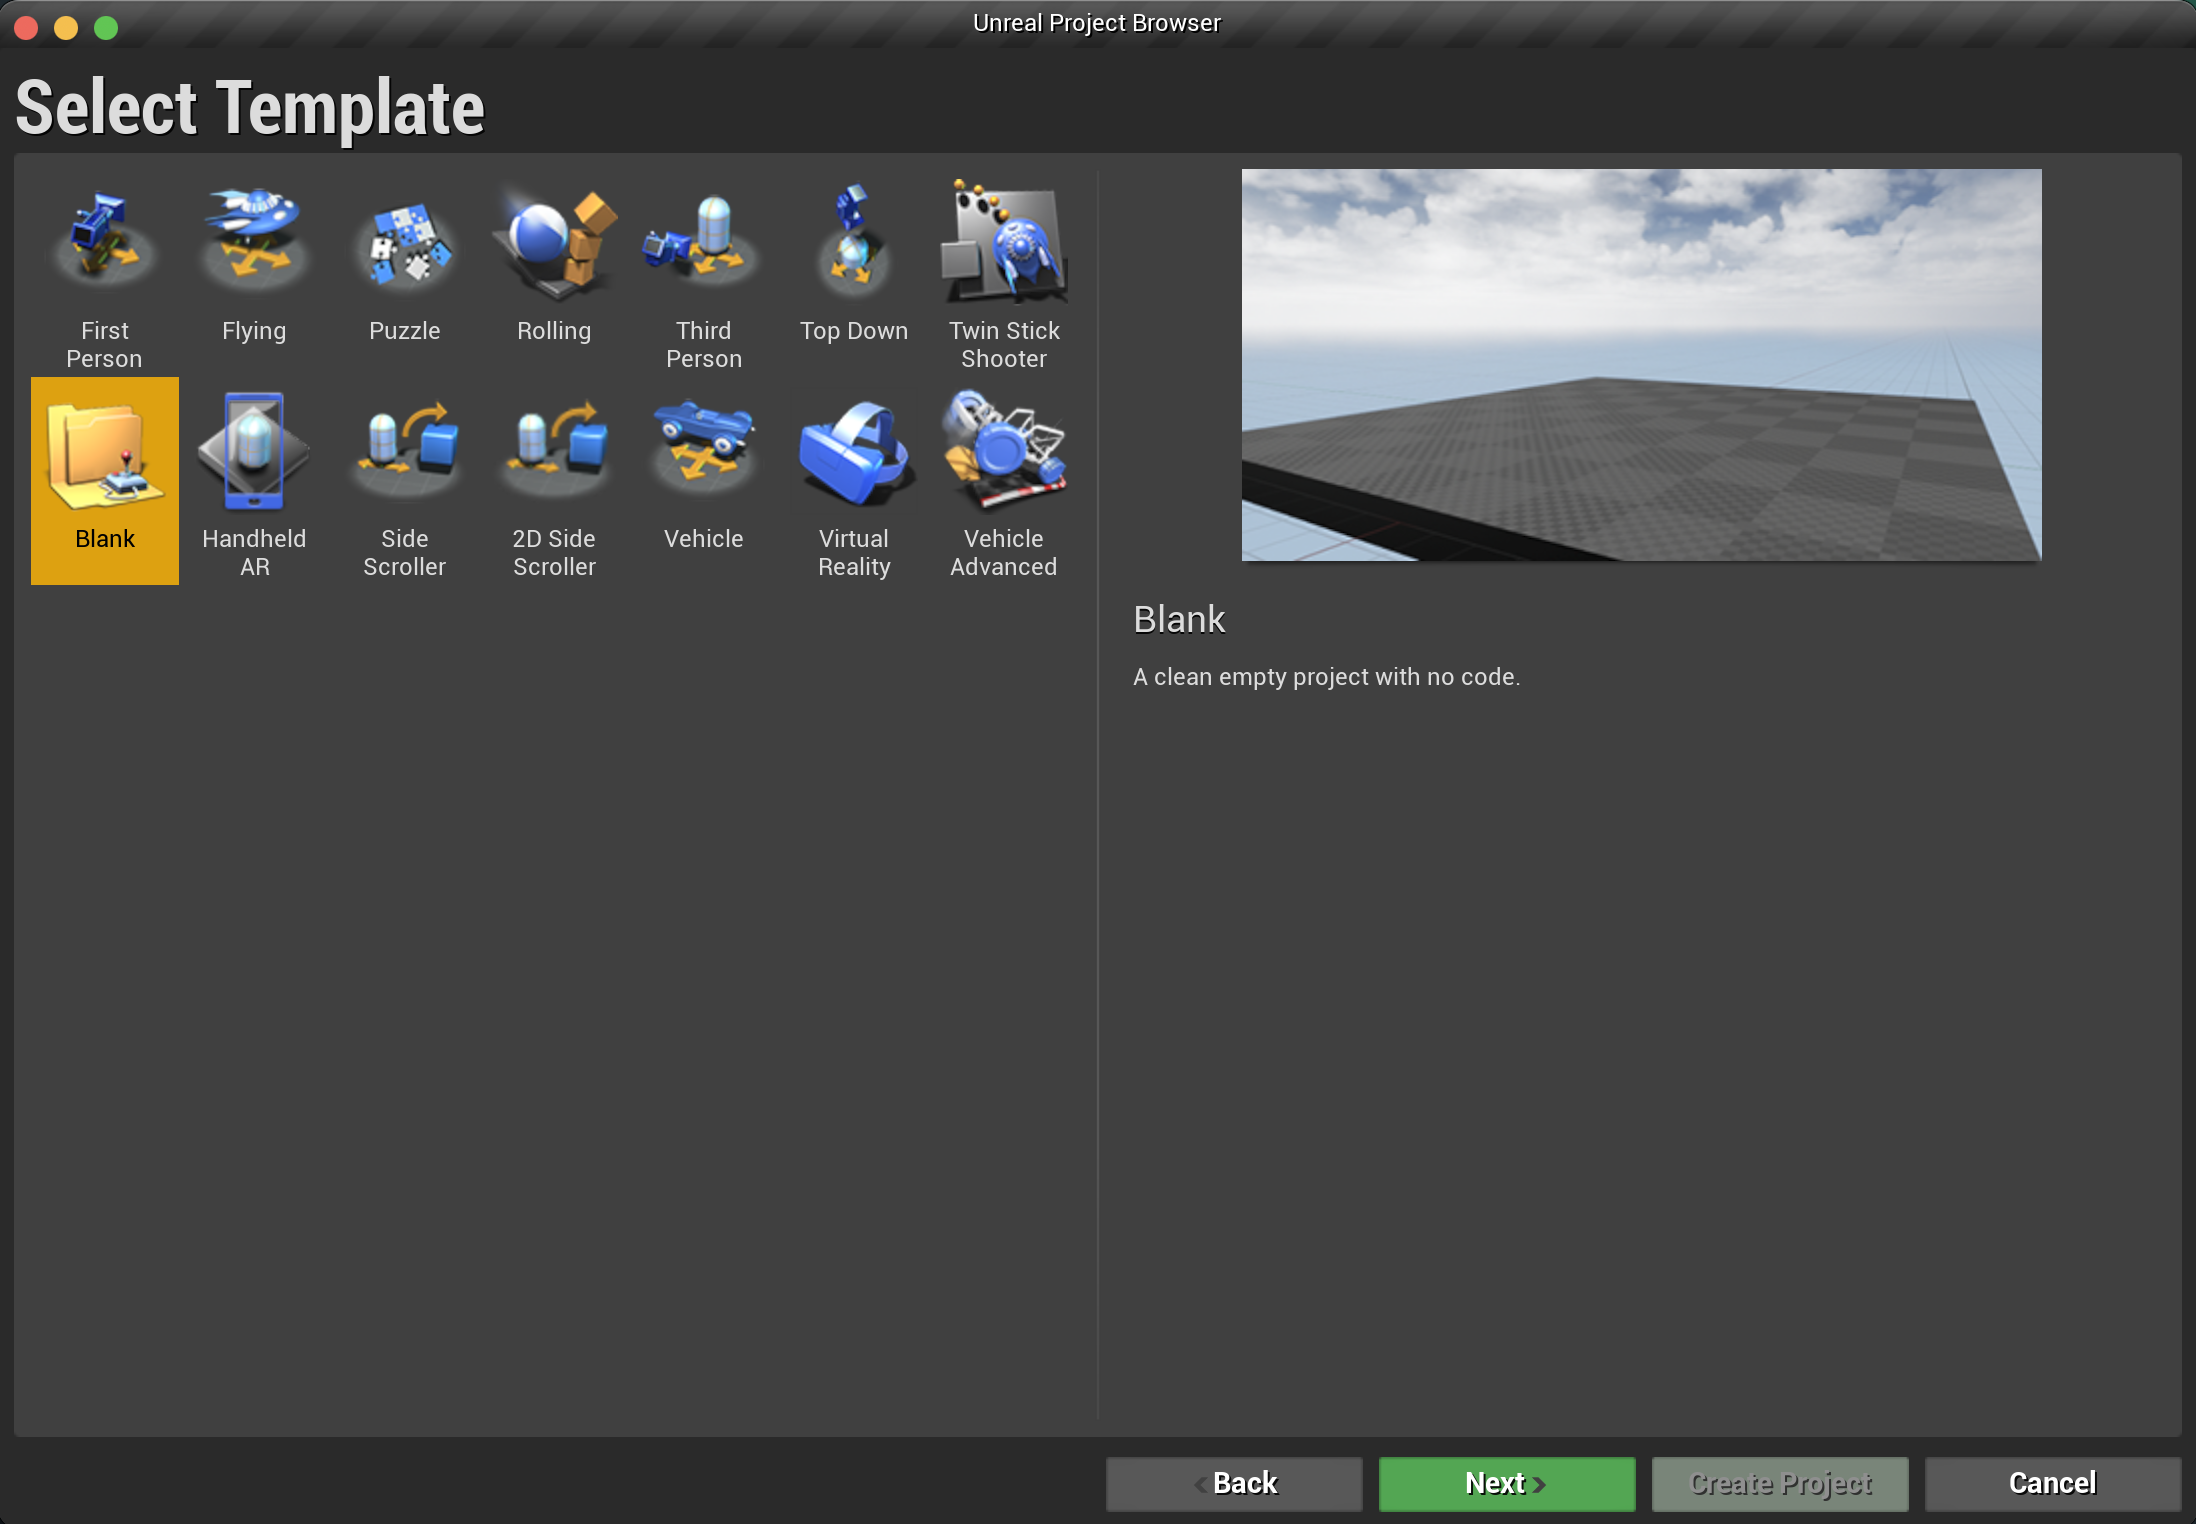
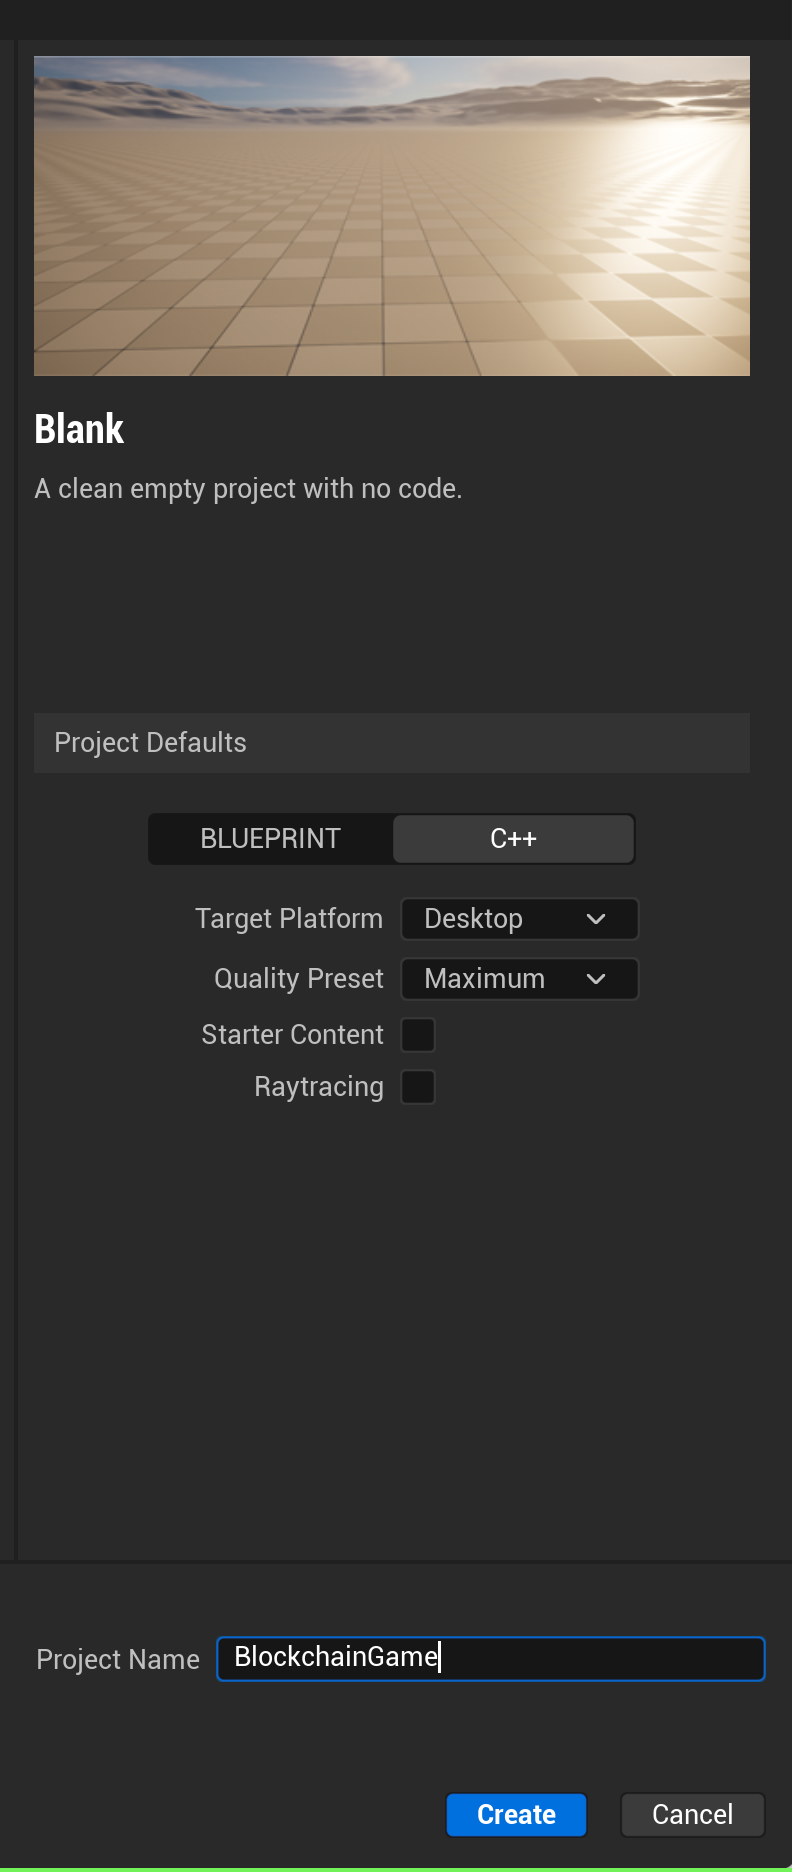
On the Template screen, select Blank and click Next
📃If you can't see any templates, you should reinstall v4
-
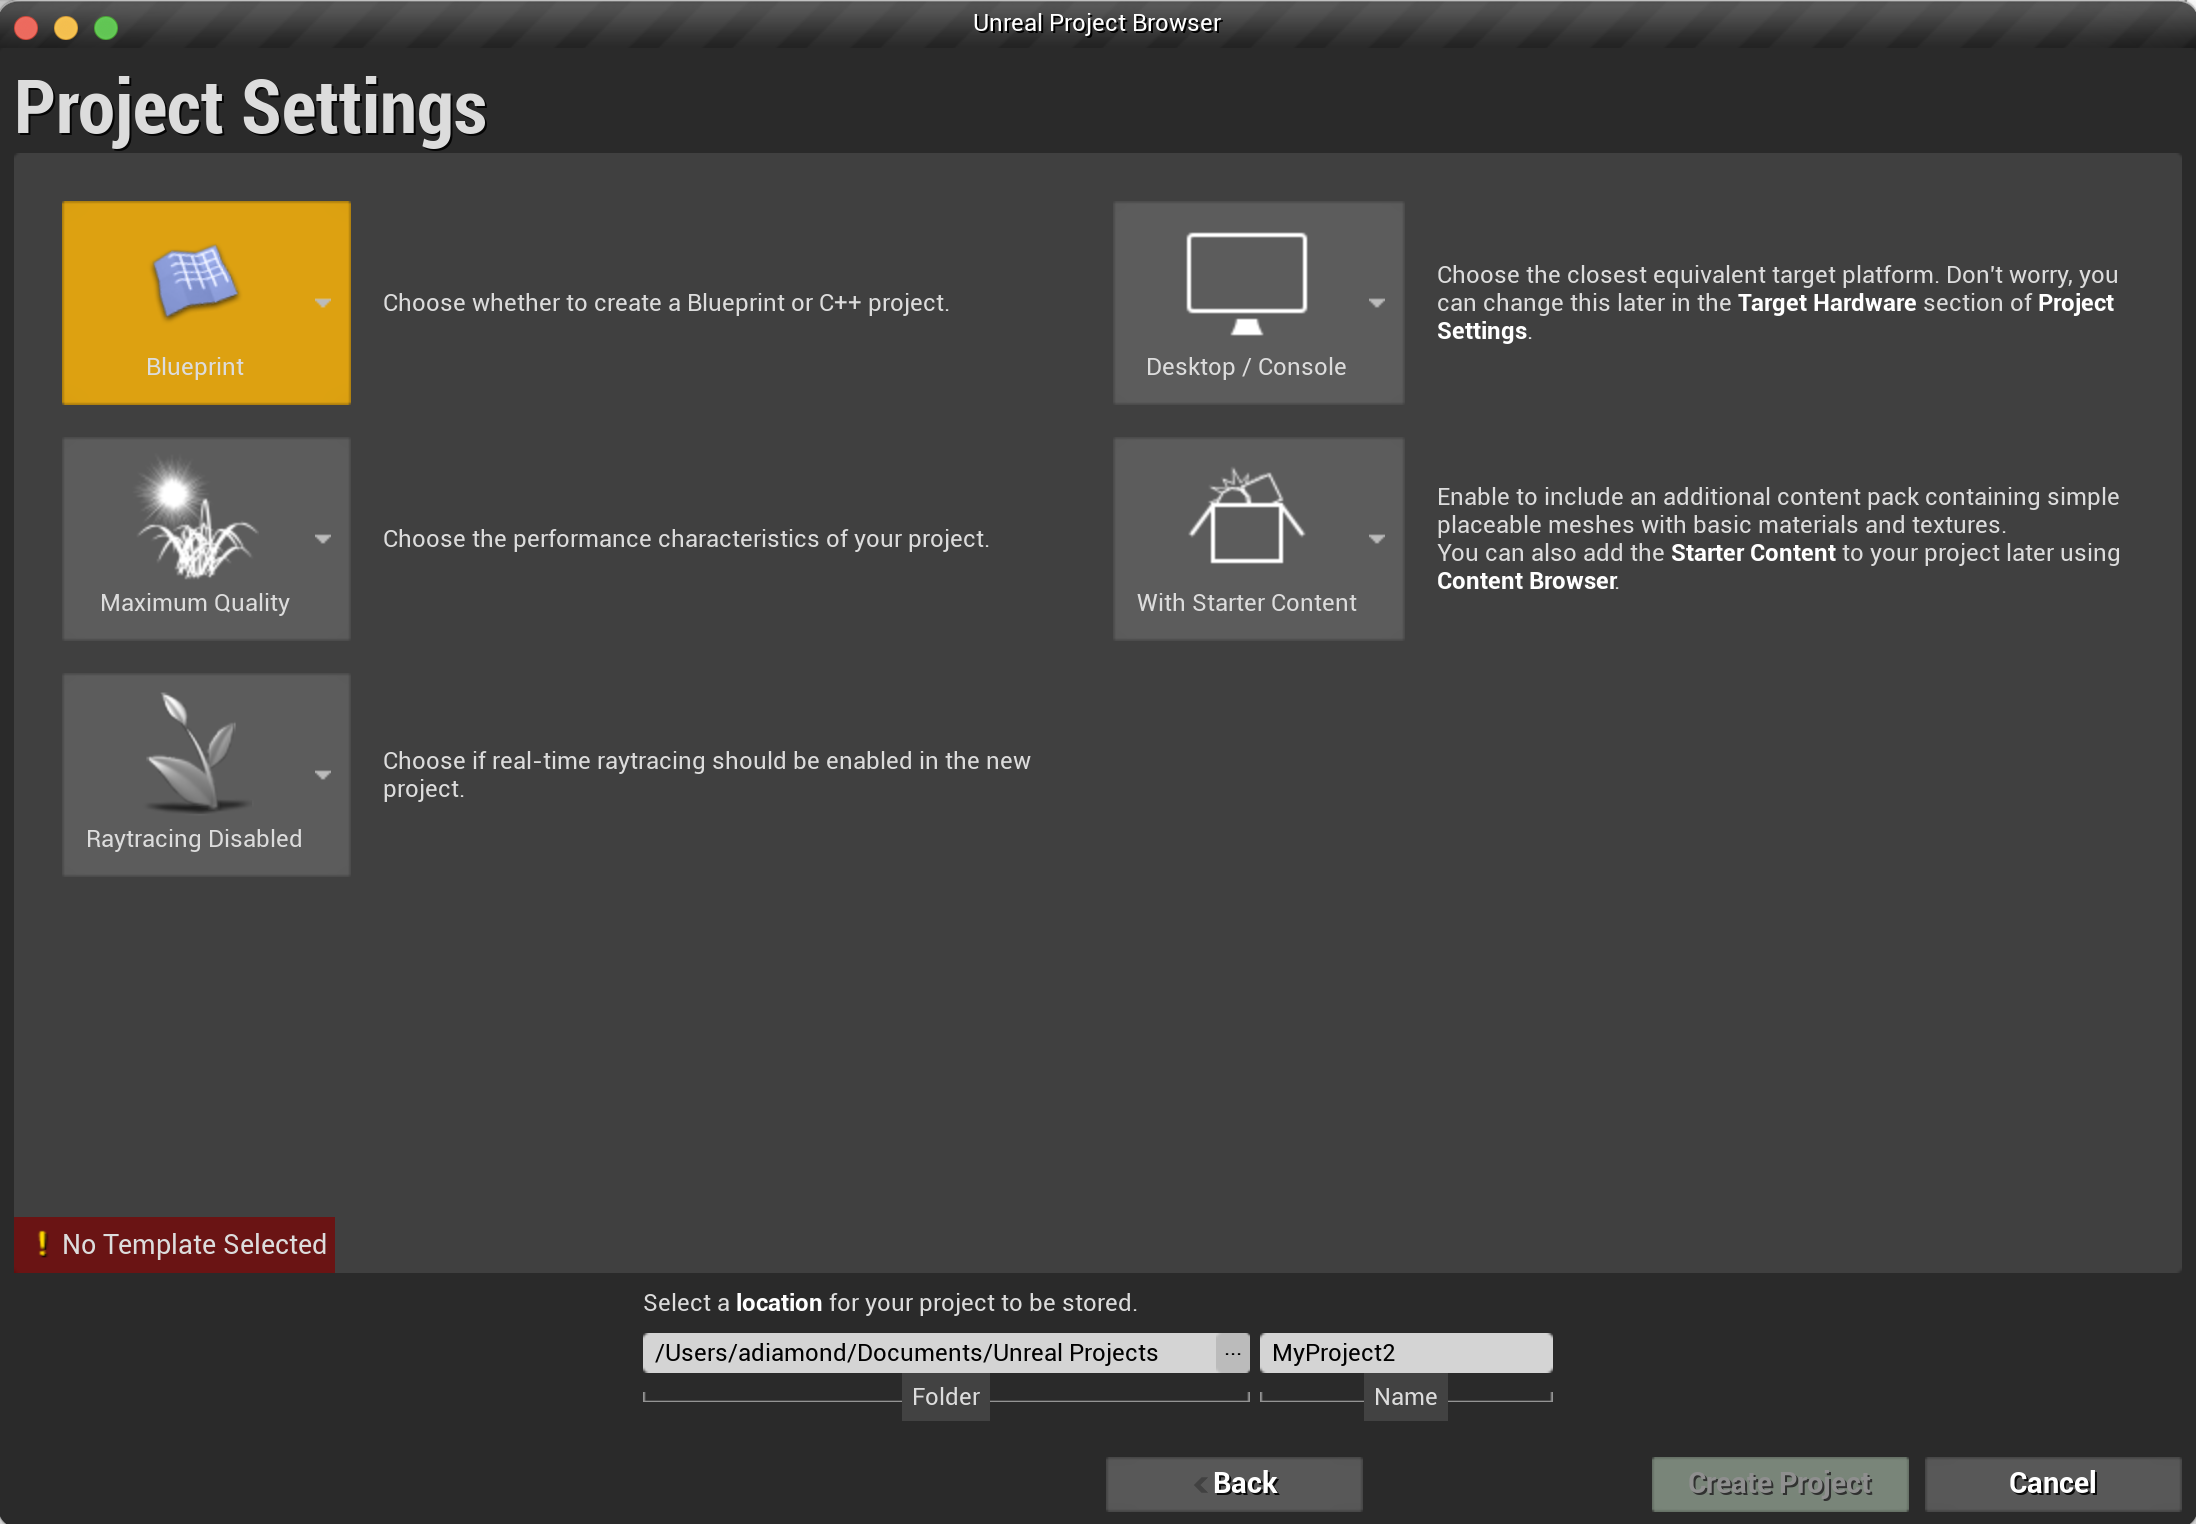
In Project Settings
-
From the Blueprint and C++ options, select C++.
-
From the Starter Content and No Starter Content options, select No Starter Content
-
From the Desktop/Console or Mobile options, select your preference.
-
Give your project a memorable name e.g. BlockchainGame and then click Create Project
-
Check your project is successfully created and opens. Then close it. So we can do the next important step of adding the SDK.
STEP THREE - Download Mirage SDK
-
Download the latest release of MirageSDK.zip package.
-
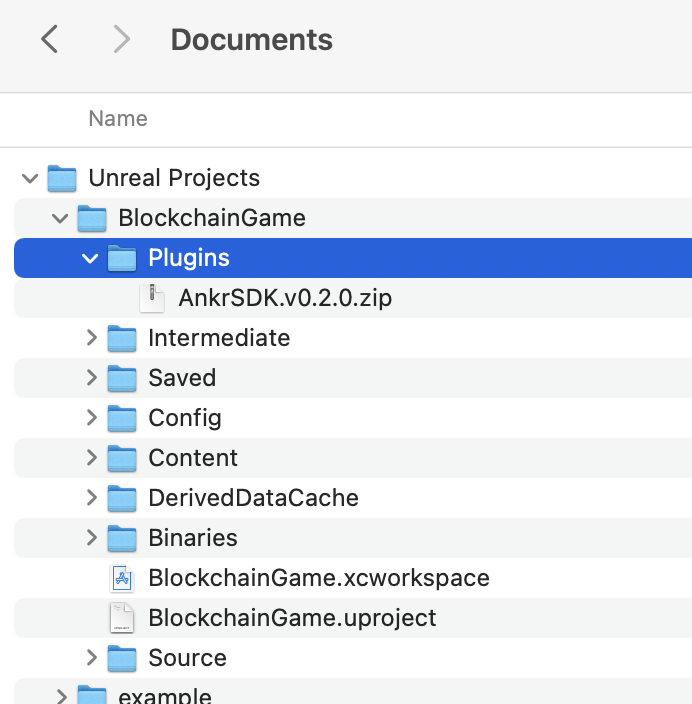
Create a new folder (if it doesn't exist) inside the project you just created and call it Plugins.
-
Extract the downloaded MirageSDK.zip contents into the Plugins folder you just created.
-
Delete the MirageSDK.zip file if it is inside the Plugins folder as well.
STEP FOUR - Generate the Xcode project
These docs are written using Xcode 13.1
-
Open Unreal Editor
-
If you get a notice saying "Missing BlockchainGame Modules Ankr SDK". Select Yes to rebuild.
-
It should now compile the project.
-
Once the project is compiled, select Tools > Generate Xcode project
-
When this is done, select Tools > Open Xcode
STEP FIVE - Build project
-
Inside Xcode, you should be able to see the AnkrSDK included in the Plugins folder.
-
Expand Games > your_unreal_project__name > Source > your_unreal_project_name > your_unreal_project_name.Build.cs
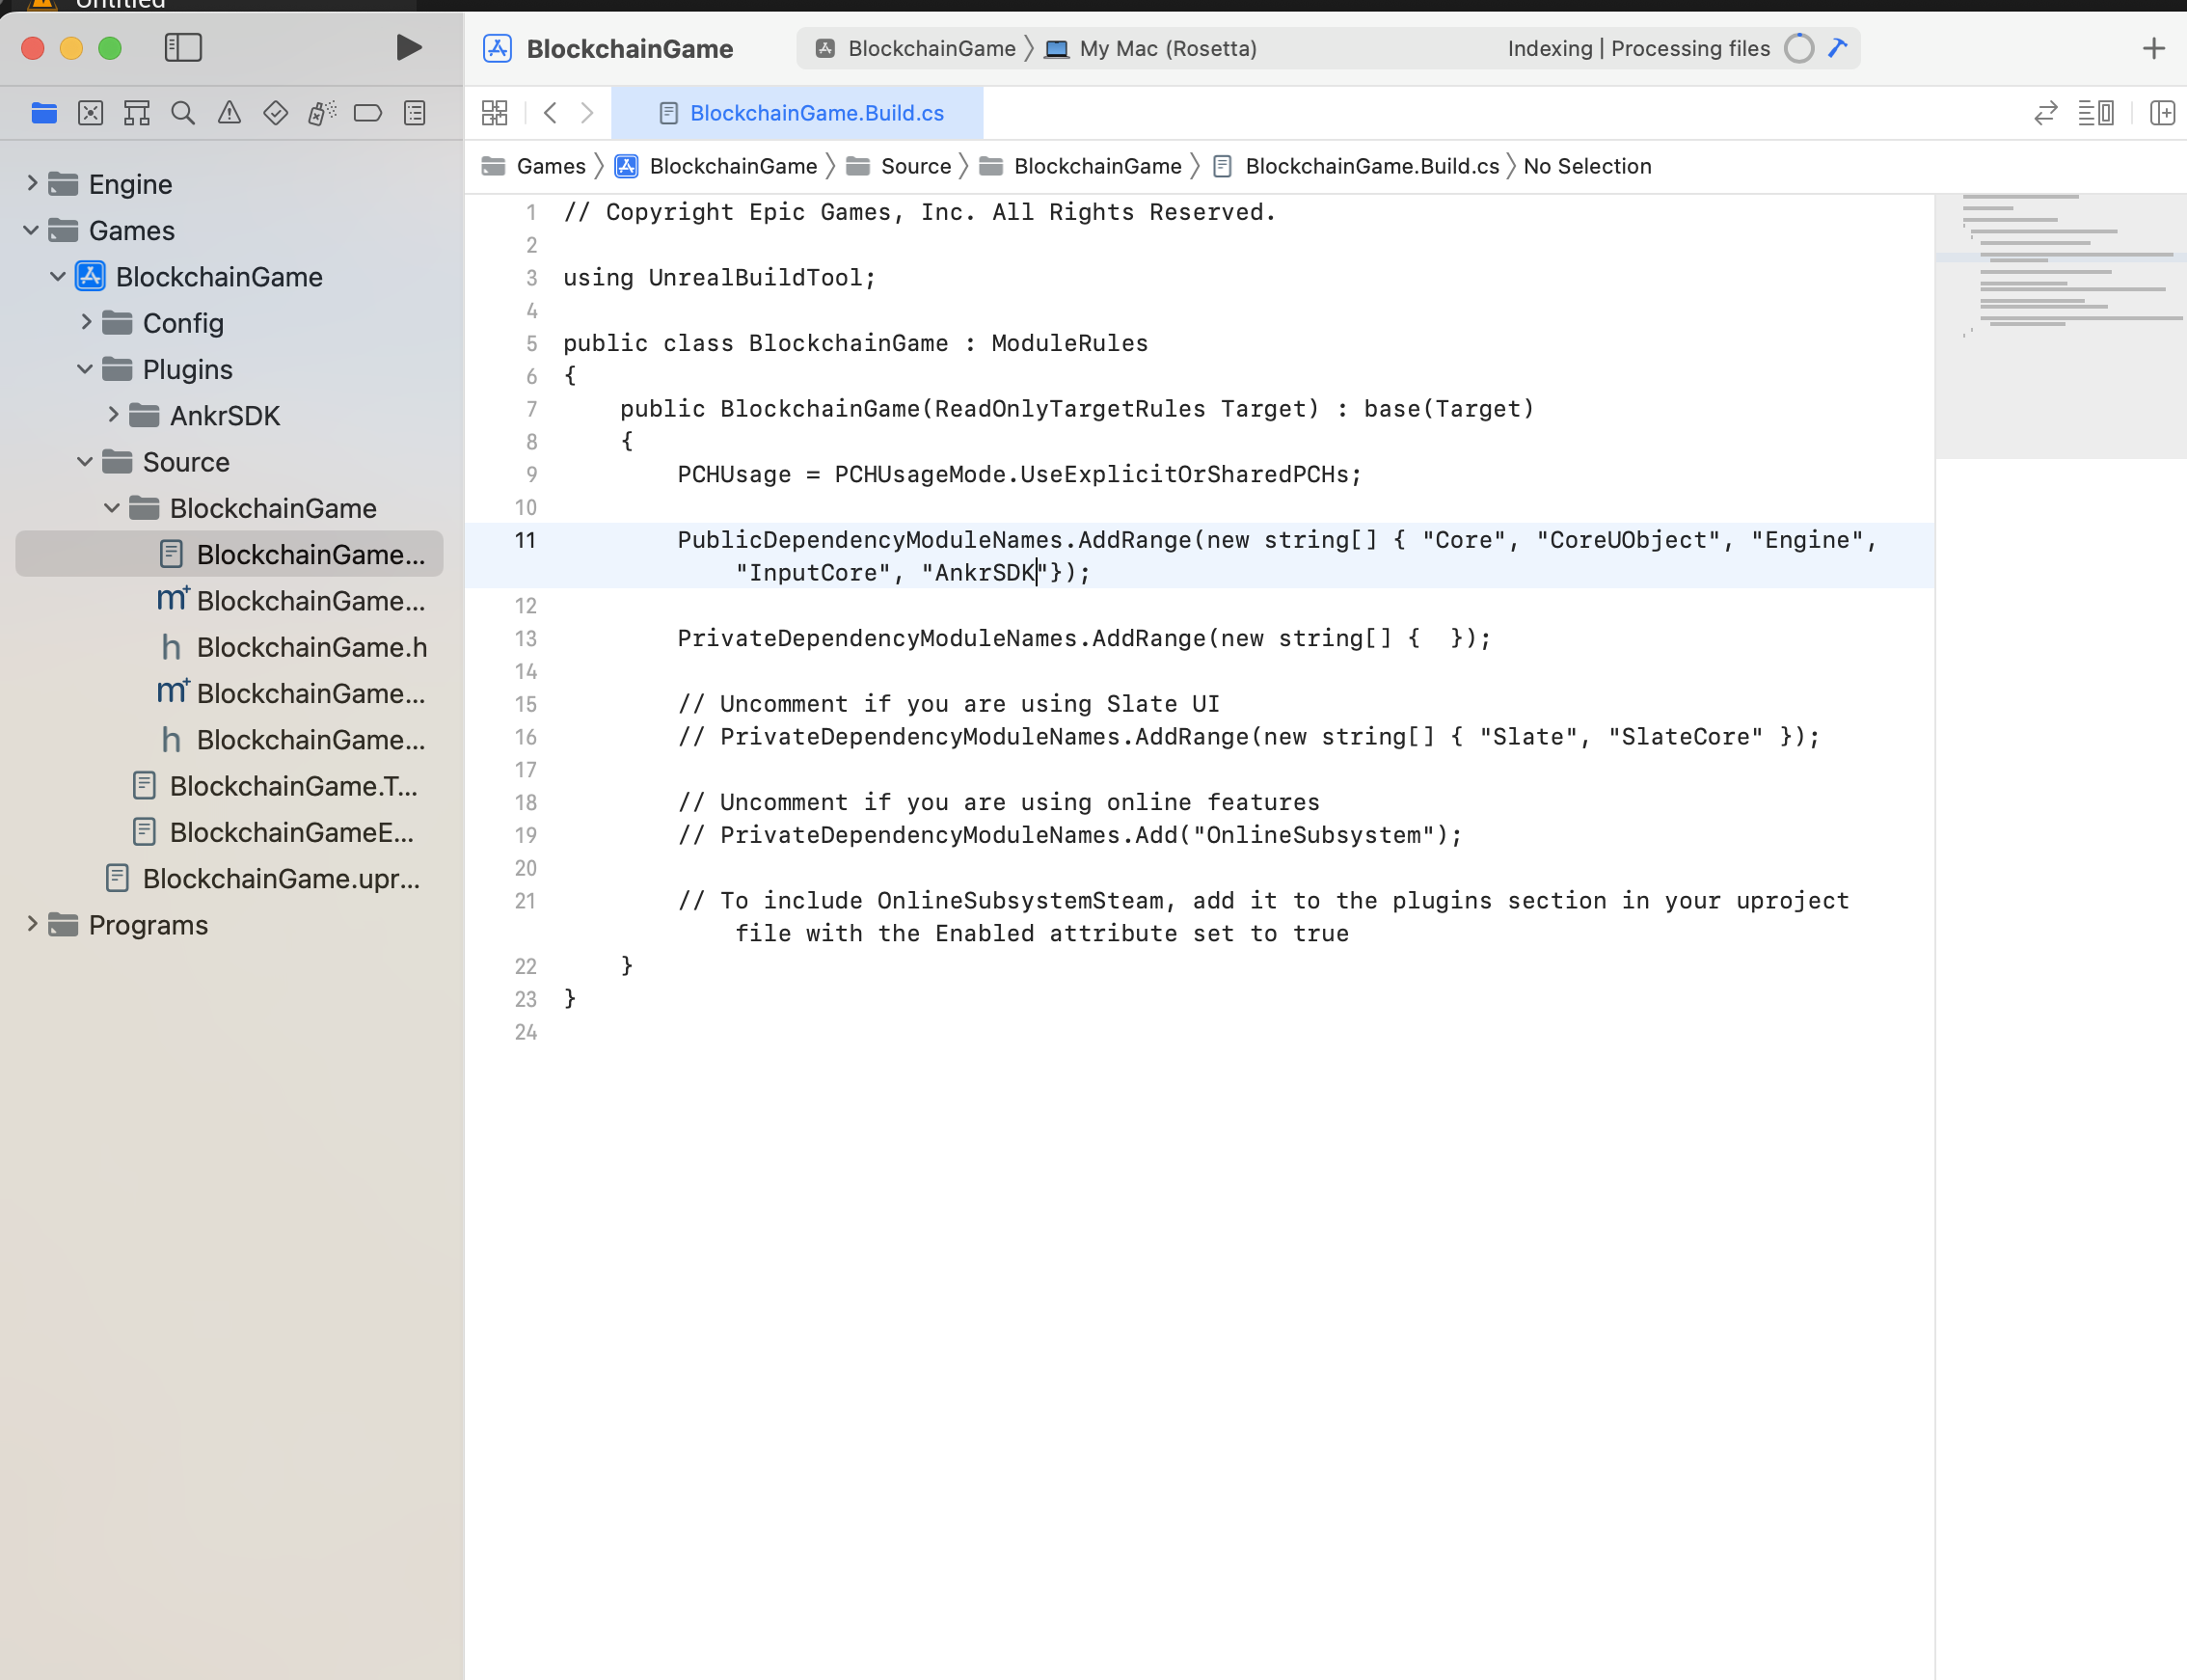
Add
"AnkrSDK"at the end of the string array as shown below:PublicDependencyModuleNames.AddRange(new string[] { "Core", "CoreUObject", "Engine", "InputCore", "AnkrSDK" }); -
Now from the top menu, select Product > Build For > running
-
You can view the Build status in the top right.
-
You know everything has worked out when a message appears stating 'Build Succeeded'.
STEP SIX - Open project in Unreal Editor
-
Locate GameInstance.h if already created. If not Add C++ class from Content Browser, check Show All Classes and select GameInstance. Name your class 'MyGameInstance'.
-
Open MyGameInstance.h and include the following code:
#include "MirageClient.h" UPROPERTY() UMirageClient* ankrClient; UFUNCTION(BlueprintCallable, Category = "MIRAGE SDK") UMirageClient* GetMirageClient(); -
Open MyGameInstance.cpp and include the following code:
UMirageClient* UMyGameInstance::GetMirageClient() { if (mirageClient == nullptr) { mirageClient = NewObject<UMirageClient>(); } return mirageClient; } -
You can now add and use all the functions from the Ankr SDK in your game.
📃Nice work!! You're all set to go
Windows 10
The following instructions are based on Windows 10.
Get Ready
- Ensure you have the latest version of Visual Studio
- Download the Epic Games Launcher to access the Unreal Engine. Download
- Install Unreal Engine v5 Download
STEP ONE - Add v5 Unreal Engine
-
Open Epic Games Launcher and view all versions of the Unreal Engine you have.
-
Click Library and the + button to add the v5 version
⚠️If you find that the + button is greyed out, then do the following: a. Sign out b. Then from the login box, scroll to the bottom and click 'Sign in Later'. c. Inside Epic Games Launcher > Library > + > v5 d. Now Sign in as usual
-
You can now click to install v5 (This takes some time)
-
Launch v5 (Be patient, this can take a little while)
📃If a pop up appears: "Do you want the app UnrealEditor.app to accept incoming network connections" Select Allow
STEP TWO - Create a new project
-
Inside the Unreal Project Browser, select the Games tab and Blank
-
Under Project Defaults, select C++
-
Deselect Starter Content
-
Give your project a memorable name e.g. BlockchainGame and then click Create
-
Check your project opens and then close it. So we can do the next important step of adding the SDK.
STEP THREE - Download Mirage SDK
-
Download the latest release of MirageSDK.zip package.
-
Create a new folder inside the project you just created and call it Plugins.
-
Extract the downloaded MirageSDK.zip contents into the Plugins folder you just created.
-
Delete the MirageSDK.zip file if it is inside the Plugins folder.
STEP FOUR - Generate a Visual Studio Project
-
Open Unreal Editor
-
If you get a notice saying "Missing your_unreal_project_name Modules Mirage SDK". Select Yes to rebuild.
-
It should now compile the project.
-
From the top menu, select Tools > Generate Visual Studio Project
-
When this is done, select Tools > Open Visual Studio Project
STEP FIVE - Build project
Inside Visual Studio project
-
Add MirageSDK to your_unreal_project_name > Source > your_unreal_project_name > your_unreal_project_name.Build.cs as shown below:
PublicDependencyModuleNames.AddRange(new string[] { "Core", "CoreUObject", "Engine", "InputCore", "MirageSDK" }); -
Generate a Visual Studio Project by right-clicking Your_unreal_project_name.uproject' and selecting Generate Visual Studio project files
-
Open the generated Visual Studio solution file (.sln) and check if the plugin is included in the solution explorer.
STEP SIX - Open Project in Unreal Editor
-
Locate GameInstance.h if already created. If not Add C++ class from Content Browser, check Show All Classes and select GameInstance. Name your class 'MyGameInstance'.
-
Open MyGameInstance.h and include the following code:
`` #include "MirageClient.h"
UPROPERTY() UMirageClient* mirageClient;
UFUNCTION(BlueprintCallable, Category = "MIRAGE SDK") UMirageClient* GetMirageClient();
-
Open MyGameInstance.cpp and include the following code:
UMirageClient* UMyGameInstance::GetMirageClient() { if (mirageClient == nullptr) { mirageClient = NewObject<UMirageClient>(); } return mirageClient; } -
You can now add and use all the functions from the Mirage SDK in your game.
📃Nice work!! You're all set to go